
Follow these steps to calculate the related dates and save them:
Step 1: From the New Events page, or from the Event Details page, click on the “Save and Calculate Docket” button on the bottom of the page. This will open the Docket Calculator.
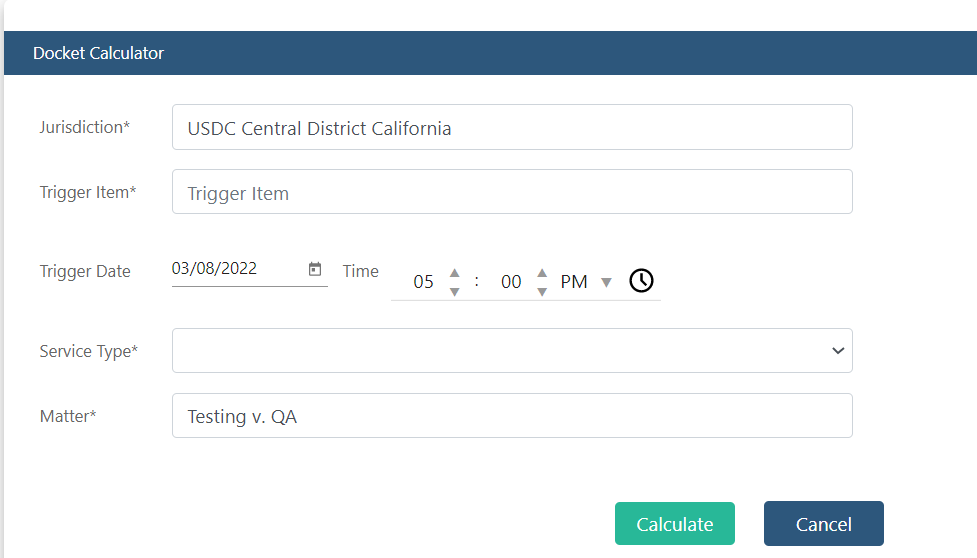
Step 2: This is the Docket Calculator page. Some of the displayed fields are prefilled with information from the trigger event. Make sure the correct trigger date, matter, jurisdiction, and method of service (if applicable) are displayed. You can edit any field, if needed.
Matter -the matter name should be auto-populated with the matter of the trigger event. If it is not, you can search and select the appropriate matter.
Jurisdiction - this is the CalenarRules jurisdiction that applies to the particular matter. It dictates the rule sets that are used for calculating the related events. The jurisdiction field is auto-populated with the jurisdiction that is set in the matter details page of the selected matter.
Trigger Item - this is the event based on which the related events will be calculated. Search for the most appropriate trigger item.
Trigger Date, Time - this is the date of the trigger event. Time is optional.
Service Type - select the manner of service, if applicable, for the trigger event. The trigger event determines whether service type is required or not. Service type will be disabled, if it is not required by the trigger. If service type is enabled, the jurisdiction must be selected in order to get the relevant service types.
Once all fields on the Docket Calculator page have been completed, click on the “Calculate” button.
Step 3: Displays all related events that are calculated based on the trigger event, jurisdiction, and service type set in Step 2.
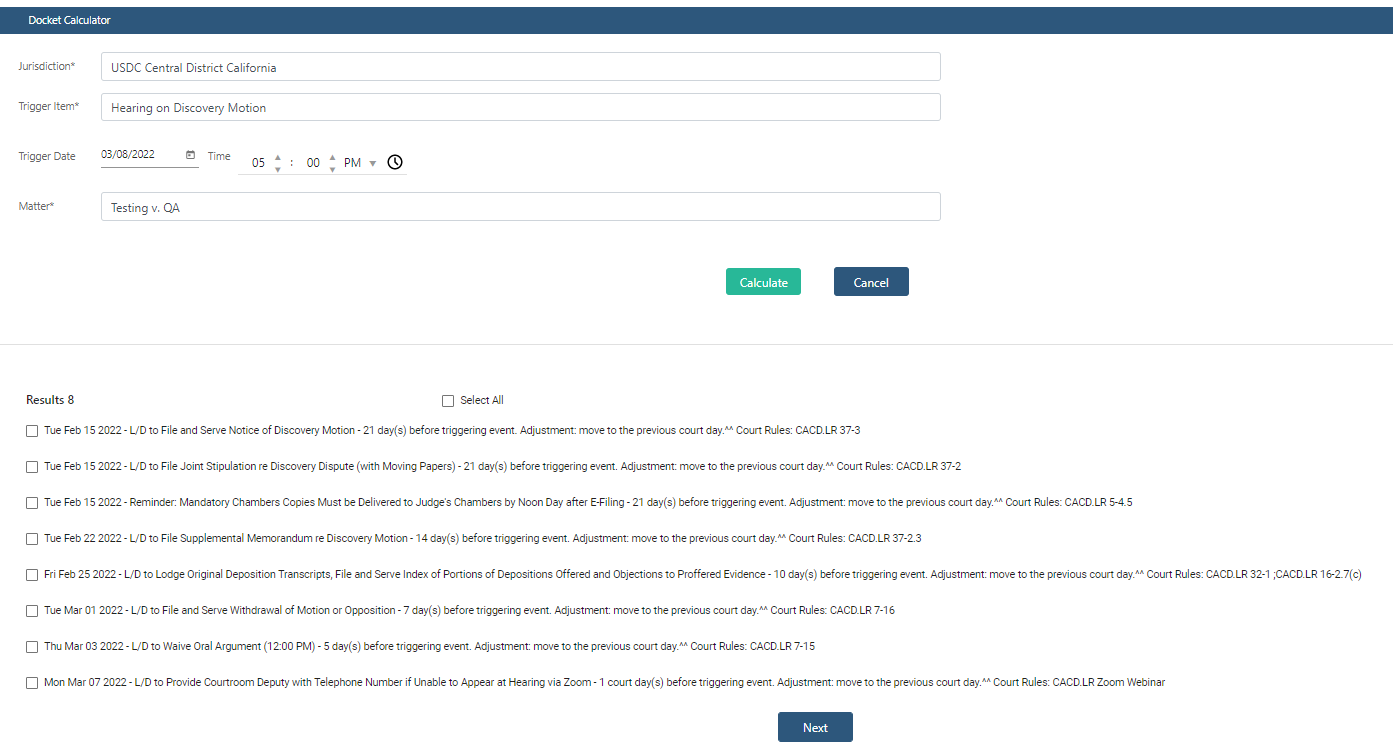
Review the related events, select the ones you want to save and click on “Next”.
Step 4: The related events selected on the previous step will be listed in chronological order by date ASC. Select the Event Type for each event. You can also add a reminder or make any edits to the events.
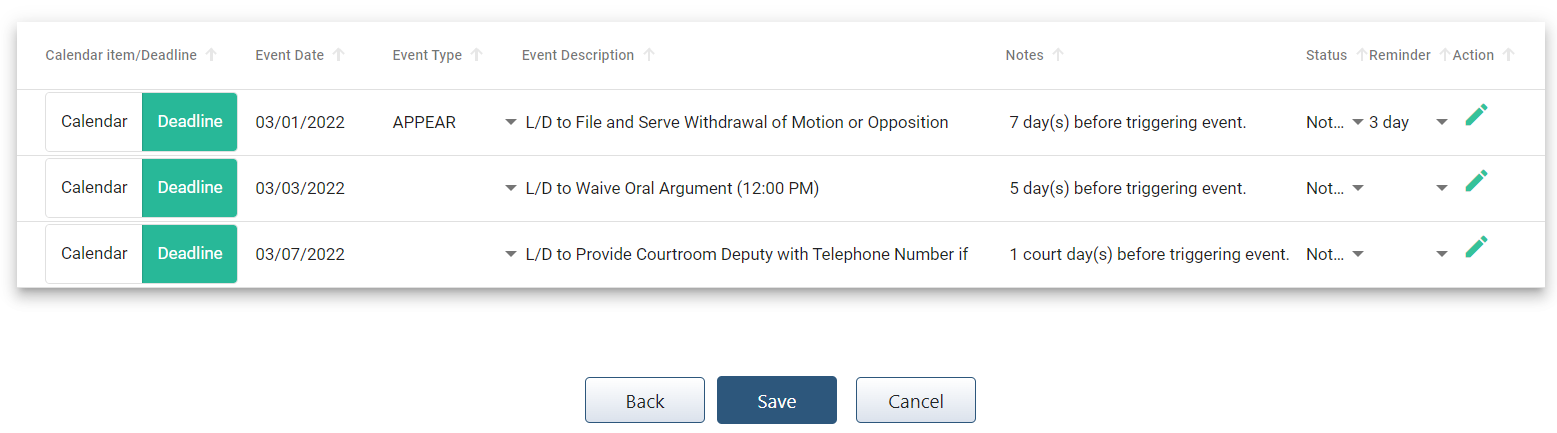
To edit an event, click on the pen icon on the far right. You will see the following screen:
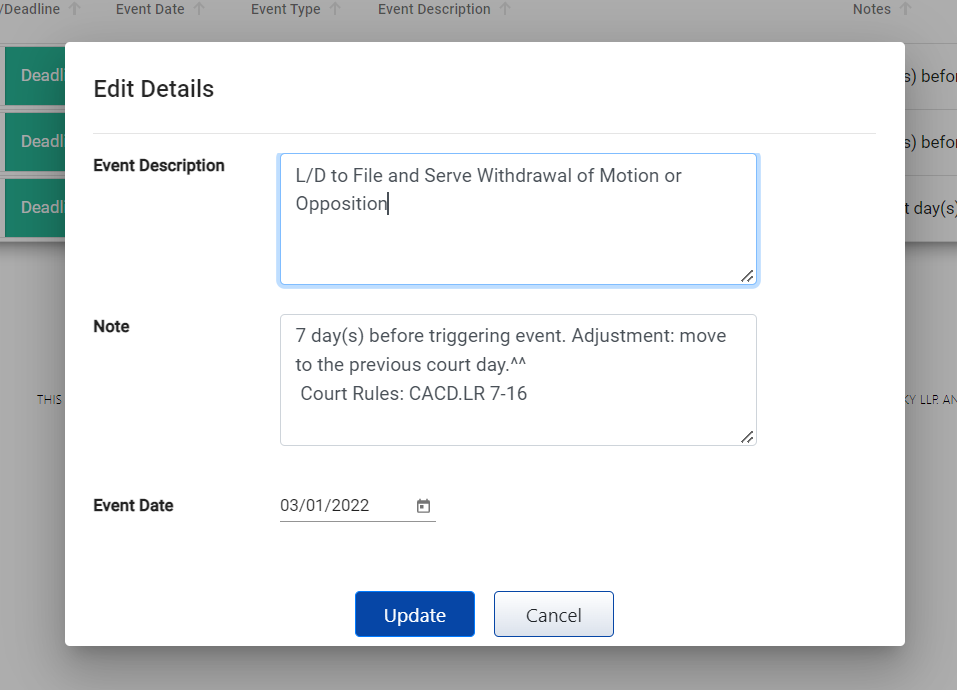
Once you are finished editing the events, click on the “Save” button and the related events will be saved in Clarra.