
To create an event, from any page click on the (+) icon button on the top right and select “+New Event”.
Another way to create a new event is from a matter’s events tab. If you are on the matters overview page, click on the quick link for that matter’s events.
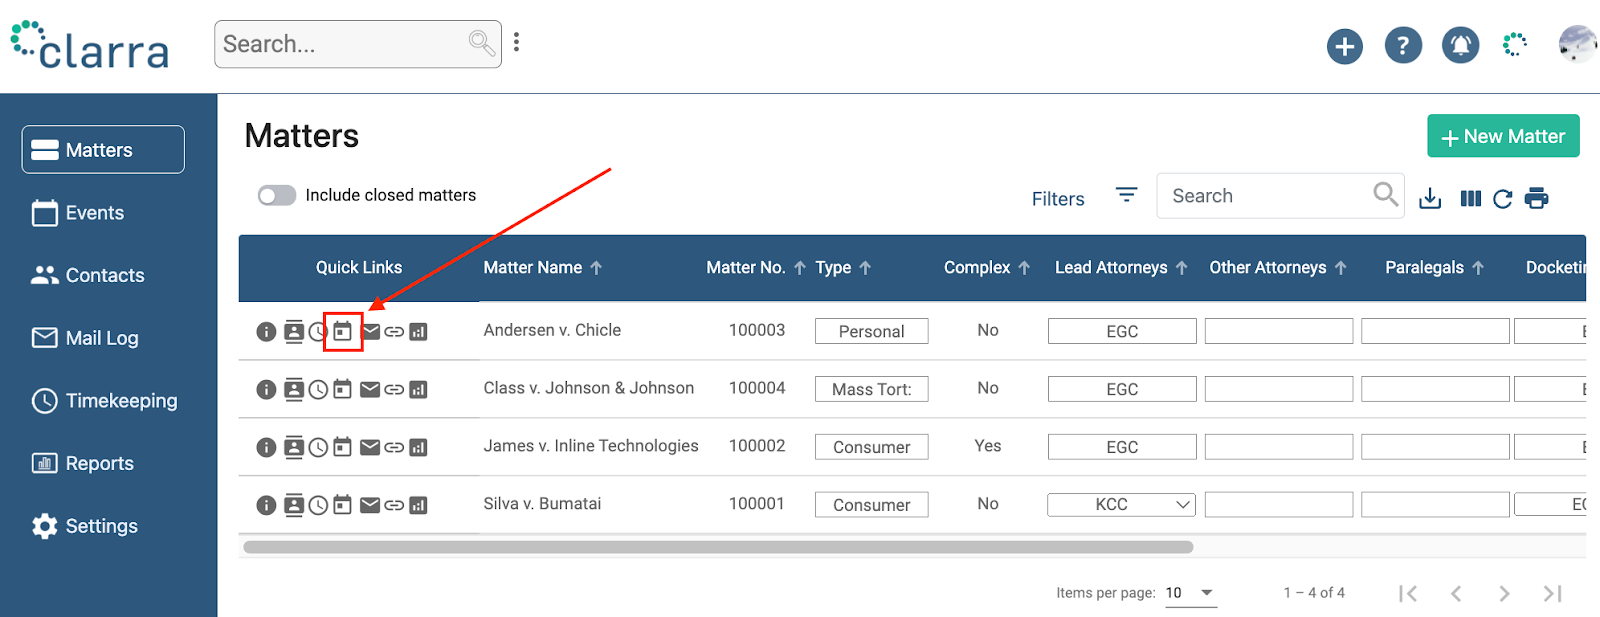
Selecting a matter’s events quick link will open the following page :
Clicking on the “+New Event” button from the Matter’s Events tab will pre-populate the matter name, as well as the assignees, in the new event form.
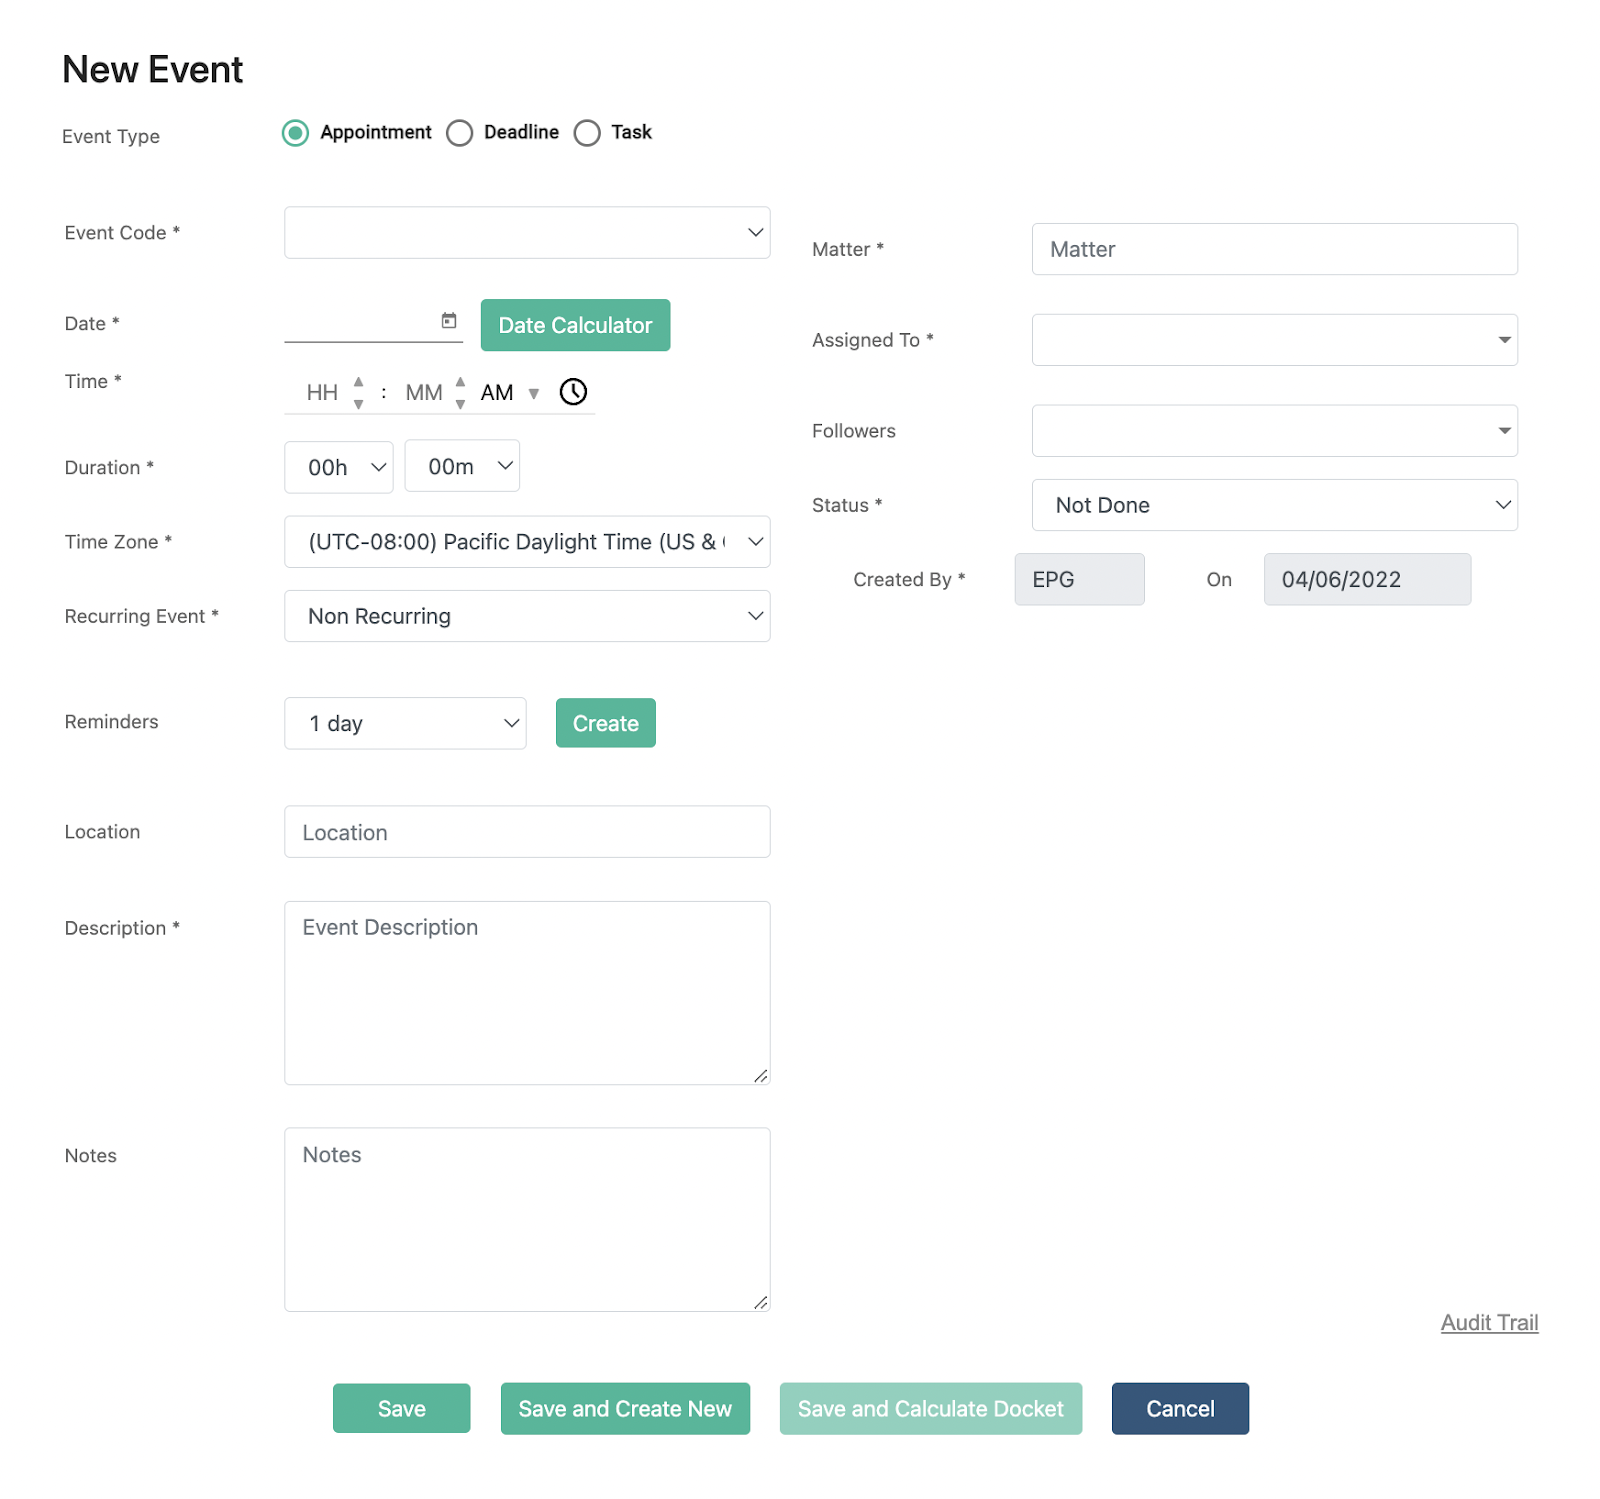
The “+Add New Event” page looks like this:
-
Event Type - select the appropriate type of event that you want to create:
Appointment - appointments have a start time and duration, and appear on your calendar.
Deadline - deadlines can be all-day events or have a cutoff time. All-day events will appear on the top part of your calendar, while deadlines with a cutoff time will appear on your calendar at the cutoff time.
Task - tasks are similar to deadlines. Tasks can be all-day events or have a cutoff time and will appear on your calendar similar to deadlines.
Event Code - the application comes with a set of event codes that you can use as a quick indication of what the event is. Event Codes can be added or edited in the Data Properties section of Account Administration.
Date - the date of appearance for an appointment or the due date for Deadline or Task.
Date Calculator - allows you to add or subtract either calendar days or work days from a date, with the option to paste the calculated date into the Date field of the new event.
Time - if you are creating an Appointment, this is the start time of the appointment and is a mandatory field. If you are creating a Deadline or a Task, the Time field indicates the deadline for the Deadline or the Task and is optional. If no start time is entered for a Deadline or a Task, it is an all-day event.
Time Zone - the default time zone of a new event is your current time zone. You can select a different time zone from the drop-down list. If you need to change your time zone for the application, you can do that in the Preferences section of User Settings.
Duration - applies to Appointments only.
-
Recurring Event - the default is for an event to be non-recurring. To create a recurring event:
Select the recurring frequency from the dropdown – daily, weekly, monthly, annually, every n th day of the week/month/year.
Select the start and end date of the recurrence.
Reminders - sends a notification, either in-app or via email, to the event assignees a certain number of days before the event. To create a reminder, select the number of days before the event from the dropdown menu and hit “Create”. An unlimited number of reminders can be created for each event.
Matter - Select the matter that this event is related to. Only open matters will appear on the list of matters to choose from.
-
Status - the default status of all new events is Not Done. The available statuses of an event are:
Not Done
In Progress
Off Calendar
Done.
- Changing the status of a deadline or task to Done or to Off Calendar will remove it from your default list of events because by default only Deadlines and Tasks with status Not Done or In Progress are being displayed. You can display all events regardless of the status by applying a filter to show events with any status.
Source Document - Attach a document - Attach a document, or multiple documents, that are related to the event, or include the source of the event for reference, if needed. You must select the matter first in order to attach a document to an event.
Created By - displays the initials of the user who created the record and date stamp of the date record was created. This data is automatically generated and cannot be edited by users.
Audit Trail - displays a complete record of any edits made to the event, including the event creation, such as the initials of the user who created the event or made a change, date stamp, and any other edits that were made to any field of an event. For each edit, the audit trail displays the old value and the new value of a record.
Assigned to - the users that this event is assigned to. An unlimited number of users can be assigned to an event. Once you select the matter for the event, all users who are assigned to the particular matter will also be assigned to the event by default, however, you can also add other users or remove some or all of the default assignees. The users assigned to an event will receive in-app and email notifications about an event date change, if they have turned those notifications on. Users can manage their notification settings in the Notifications tab in User Settings.
Followers - Followers receive notifications about changes in the event’s date, as long as they have selected to receive those notifications in User Settings. Unlimited number of followers can be added to an event.